- GD&T
GENERAL DIMENSIONING- International Paper Size Standards
- Technical Drawing Styles
- ISO And ANSI Projections
- ANSI Technical Drawing Views
- Technical Drawing Dimesioning Types
- ANSI and ISO Geometric Tolerancing Symbols
- Geometric Tolerancing Reading
- Taylor Principle Rule#1
- Form Tolerances
- Profile Tolerances
- Orientation Tolerances
- Location Tolerances
- Runout Tolerances
- TOLERANCES
ANSI AND ISO- Tolerancing and Engineering Standards
- Hole and Shaft Basis Limits And Fits
- ISO International System For Limits And Fits
- International Tolerance Grade (IT)
- Fundamental Deviations For Hole and Shaft Basis
- ISO Tolerance Band IT01-IT16
- Calculation Of International Tolerance
- Calculation of Upper and Lower Deviation For Shaft
- Calculation of Upper and Lower Deviation For Holes
- ISO Shaft Tolerances (3mm-400mm)
- ISO Shaft Tolerances (400mm-3150mm)
- ISO Hole Tolerances (3mm-400mm)
- ISO Hole Tolerances (400mm-3150mm)
- ANSI Standard Limits and Fits
- METAL CUTTING TECHNOLOGIES
- Terms and Definitions of the Cutting Tools
- Cutting Tool Materials
- Selection of Carbide to machine the work-part
- Identification System For Indexable Inserts
- Work-Part Materials
- Machinability and the specific cutting force
- Machinability of the Certain Material Evaluations
- Cutting Forces and Chip Formations
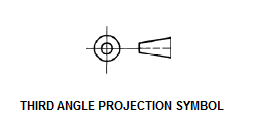
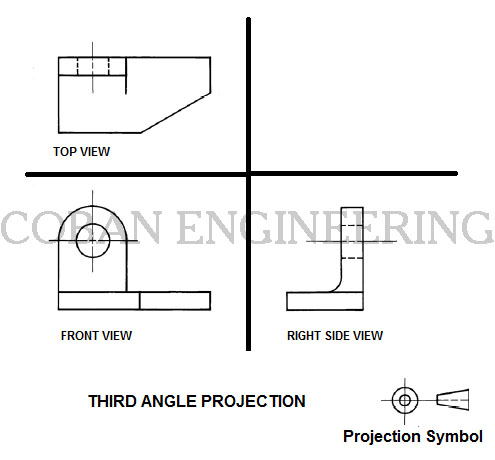
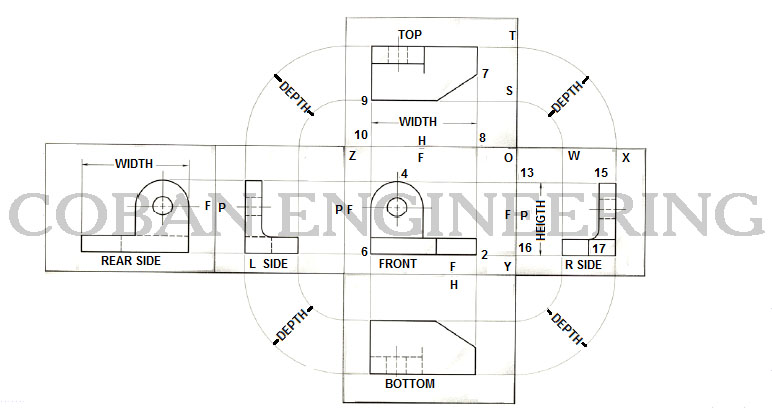
Third-angle projection is primarily used in the United States and Canada, where it is the default projection system according to ASME standard ASME Y14.3-2003 and British Standard BS 8888.When the 3D object is projected into 2D "paper" After projected Front view the top view is placed on the top and the left view is placed on the left. The symbol shown as follow;
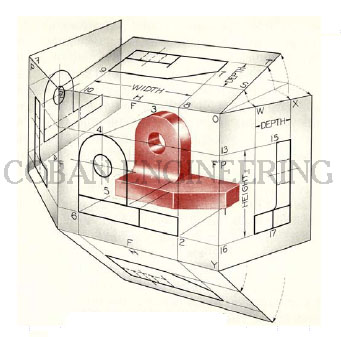
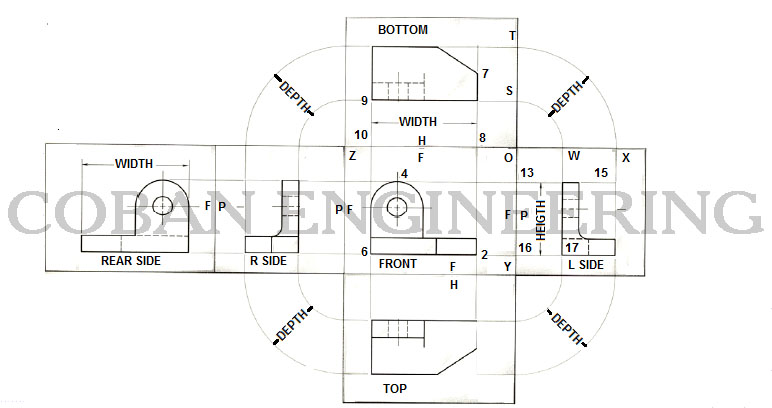
To show six views of the objects is possible by using unfolding the glass box method either for ISO and ANSI; A Glass box method is planes of forms always observed from out side of the box. The planes are placed parallel around the object as shown below. So the views of the object can easily be reflected to the imagined planes around the box.
To Show Multiview Of Objects By Using First Angle Projection;
To Show Mutliview Of Objects By Using Third Angle Projection;
Copyright ©2010-2023 Coban Engineering.All Rights Reserved.

